NE301 Model Converter
1. Overview
NE301 Model Converter is a Docker-based zero-code model conversion platform that automatically converts PyTorch/YOLO models to NE301 edge device compatible .bin format.
Core Features:
- Zero-Code Operation - Web interface, no programming experience required
- End-to-End Automation - PyTorch → TFLite → Quantization → NE301 .bin fully automated pipeline
- Intelligent OOM Recovery (v2.1 new) - Automatically diagnoses and fixes NE301 memory issues
- Real-Time Progress Feedback - WebSocket push conversion progress and logs
- Multiple Size Support - Supports 256/320/480 input sizes (default 256)
- Cross-Platform Deployment - macOS / Linux / Windows
Supported Models: YOLOv8 (all variants)
Conversion Pipeline:
PyTorch (.pt/.pth)
    ↓ [0-30%] Export to TFLite
TFLite (float32)
    ↓ [30-60%] ST official quantization
Quantized TFLite (int8)
    ↓ [60-70%] NE301 preparation + mpool auto-fix
    ↓ [70-100%] NE301 packaging
NE301 .bin file
2. Environment Setup
2.1 System Requirements
| Component | Requirement |
|---|---|
| Docker Desktop | Must be installed and running |
| Memory | Minimum 4GB, recommended 8GB |
| Disk Space | 10GB+ (for Docker images) |
| Browser | Chrome / Firefox / Safari / Edge (latest version) |
2.2 Tech Stack
| Component | Version |
|---|---|
| Python | 3.11/3.12 (3.14 not supported) |
| PyTorch | 2.4.0 |
| Ultralytics | 8.3.0 |
| TensorFlow | 2.16.2 |
| FastAPI | Starlette 0.52.1 |
2.3 Install Docker Desktop
macOS/Linux:
# Visit official website to download and install
https://www.docker.com/products/docker-desktop/

# Verify installation
docker --version
docker ps
Windows:
Download and install Docker Desktop for Windows, then restart your computer.
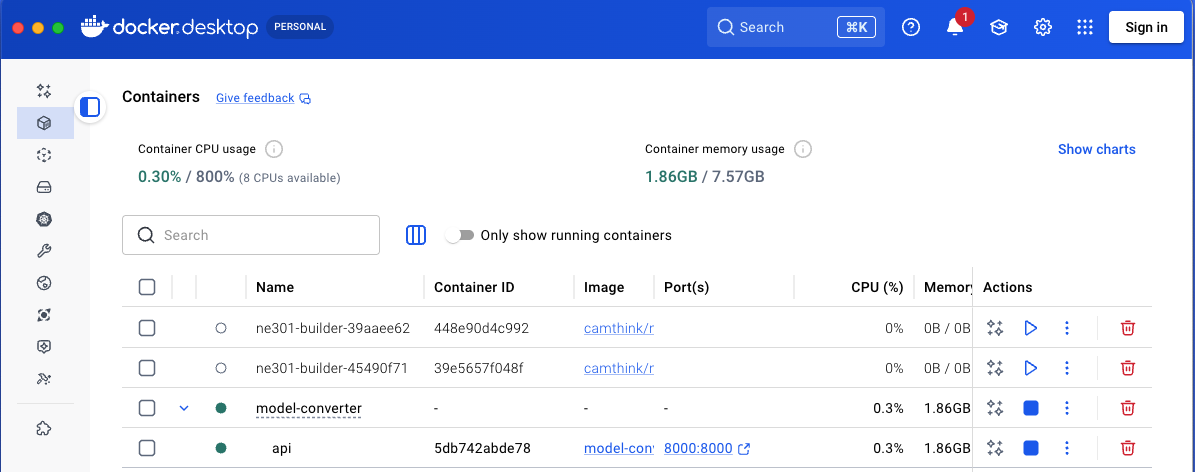
Docker Desktop running interface
3. Installation & Deployment
3.1 Clone Project
Step 1: Clone Main Project
git clone https://github.com/camthink-ai/ne301-model-converter.git
cd ne301-model-converter
Step 2: Clone NE301 Toolchain
# NE301 toolchain for model packaging and quantization
git clone https://github.com/camthink-ai/ne301.git ne301
Project Structure:
ne301-model-converter/
├── backend/              # FastAPI backend
├── frontend/             # Web frontend
├── ne301/               # [NE301](https://www.camthink.ai/store/ne301/) toolchain
├── docker-compose.yml   # Production deployment
├── docker-compose.dev.yml   # Development environment
└── docker-compose.dev.local.yml  # Local development (recommended)
3.2 Pull Dependency Images
# Pull NE301 toolchain image (~1GB)
docker pull camthink/ne301-dev:latest
3.3 Start Services
Production Deployment (first startup ~2 minutes):
docker-compose up -d
Local Development (restart ~2 seconds after code changes):
docker-compose -f docker-compose.dev.local.yml up -d
Verify Services:
# Check container status
docker-compose ps

# View logs
docker-compose logs -f
3.4 Access Web Interface
Open your browser and navigate to:
http://localhost:8000
Seeing the NE301 Model Converter interface indicates successful deployment.
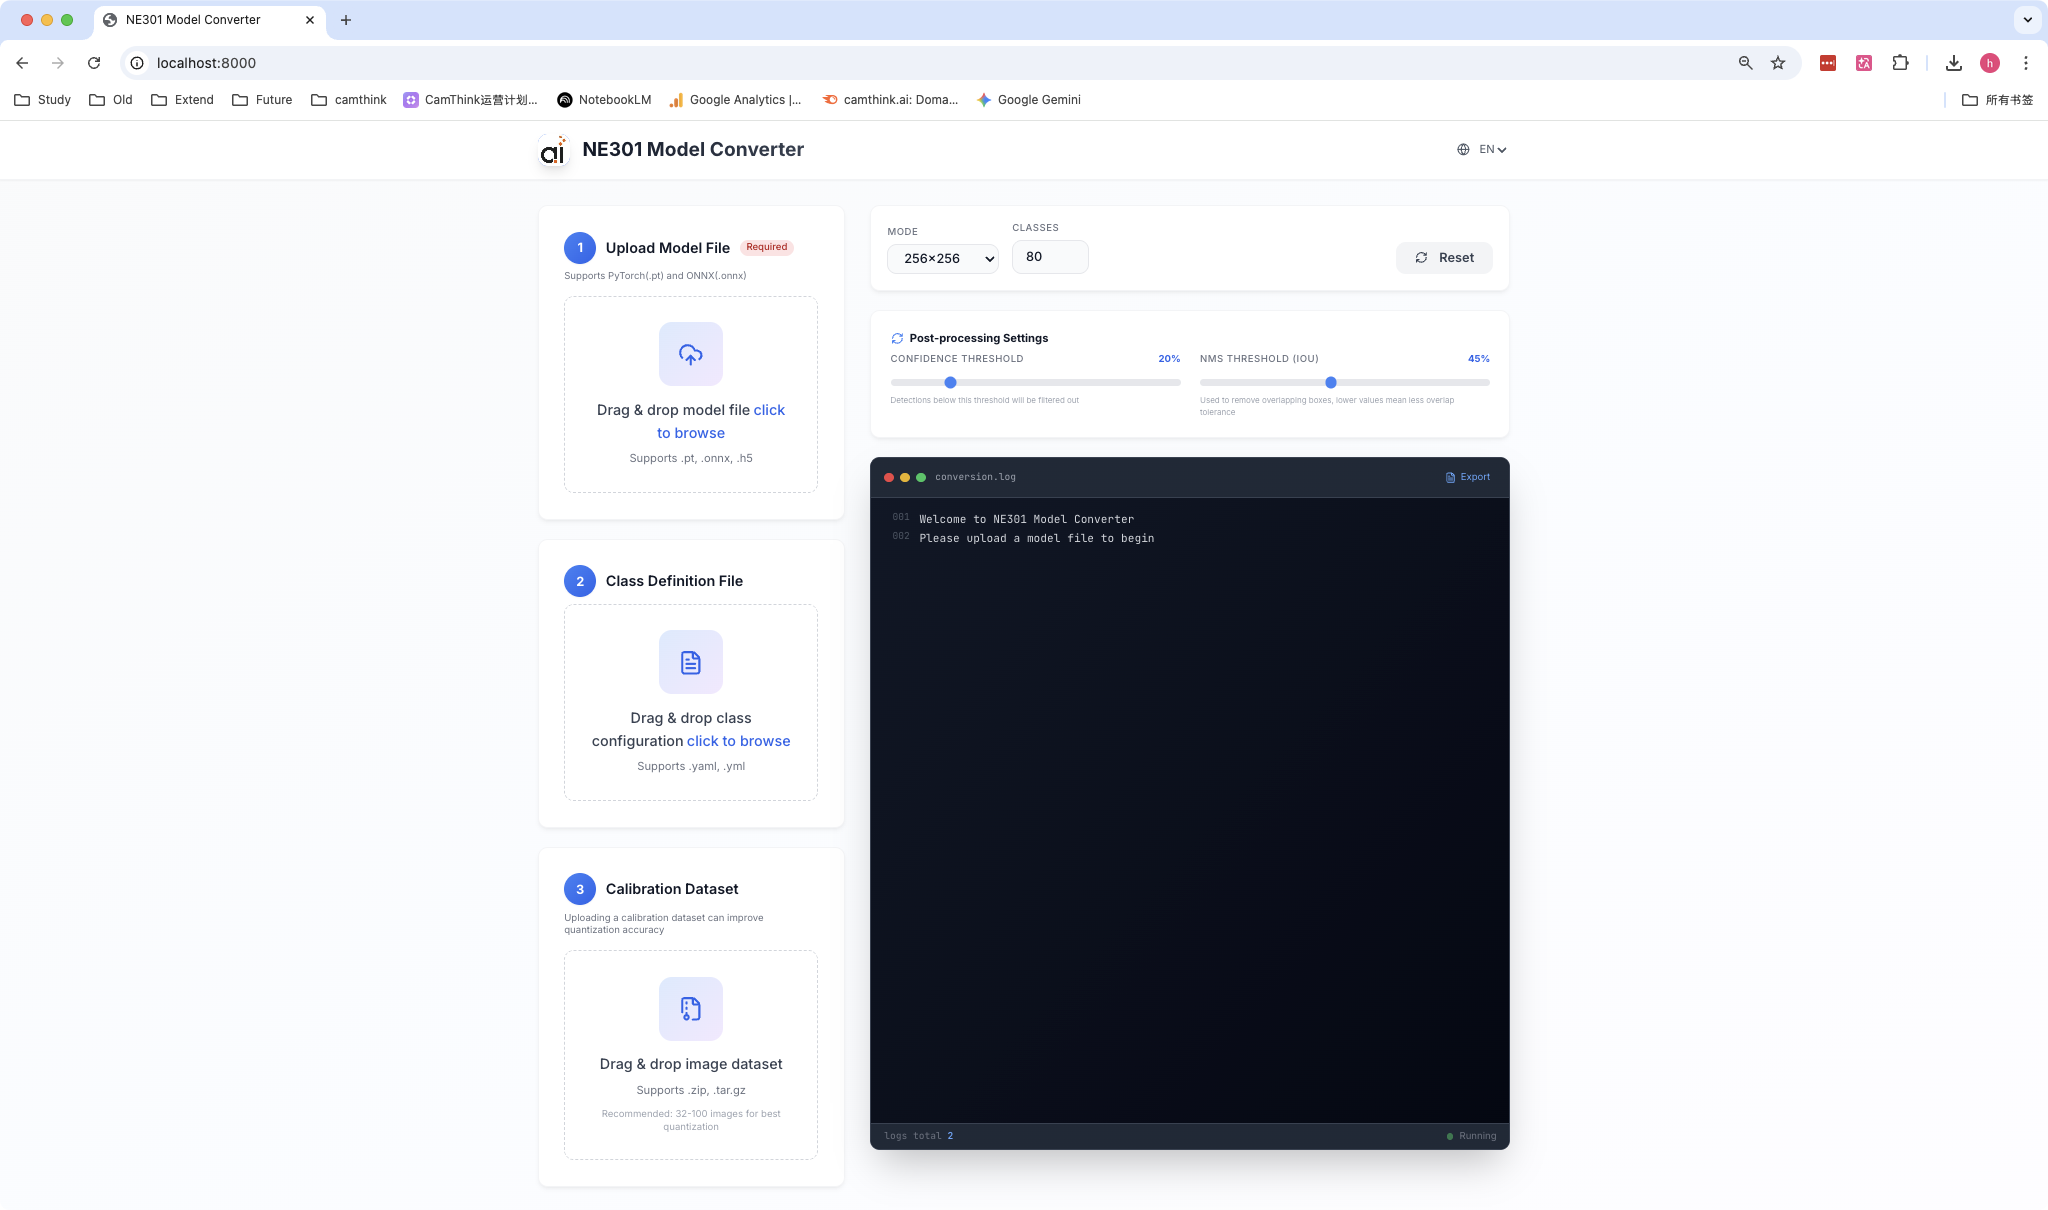
NE301 Model Converter Web Interface
4. Model Conversion
4.1 Prepare Model Files
Required Files:
- PyTorch model file (
.ptor.pth) - Maximum file size: 500MB
Recommended Files:
- Class Definition YAML: Defines detection class names, improves detection result readability
- Calibration Dataset ZIP: Contains 32-100 representative images, improves quantization accuracy by 5-15% (strongly recommended)
Calibration Dataset Creation Steps:
# 1. Create image directory
mkdir calibration_images

# 2. Copy 32-100 representative images
cp /path/to/your/images/*.jpg calibration_images/

# 3. Create ZIP file
zip -r calibration.zip calibration_images/
Best Practices:
- ✅ Use images similar to production data
- ✅ Include various lighting conditions and angles
- ✅ Image count: 32-100
- ❌ Avoid duplicate or overly similar images
Example Models (Project Provided):
The project provides a complete set of example files in the example/ directory:
- Model File:
example/best.pt(6MB) - 30-class household items detection YOLOv8 model - Class Definition:
example/test.yaml(531B) - 30 class names (Banana, Apple, Orange, etc.) - Calibration Dataset:
example/calibration.zip(10MB) - ~50 representative images
Model Details:
- Training Data: Household trash/recycling dataset
- Detection Classes: 30 household item categories (fruits, vegetables, food, packaging, etc.)
- Use Cases: Smart waste sorting, inventory management, smart home
4.2 Upload Model
- Click "Select Model File"
- Choose
.ptor.pthfile
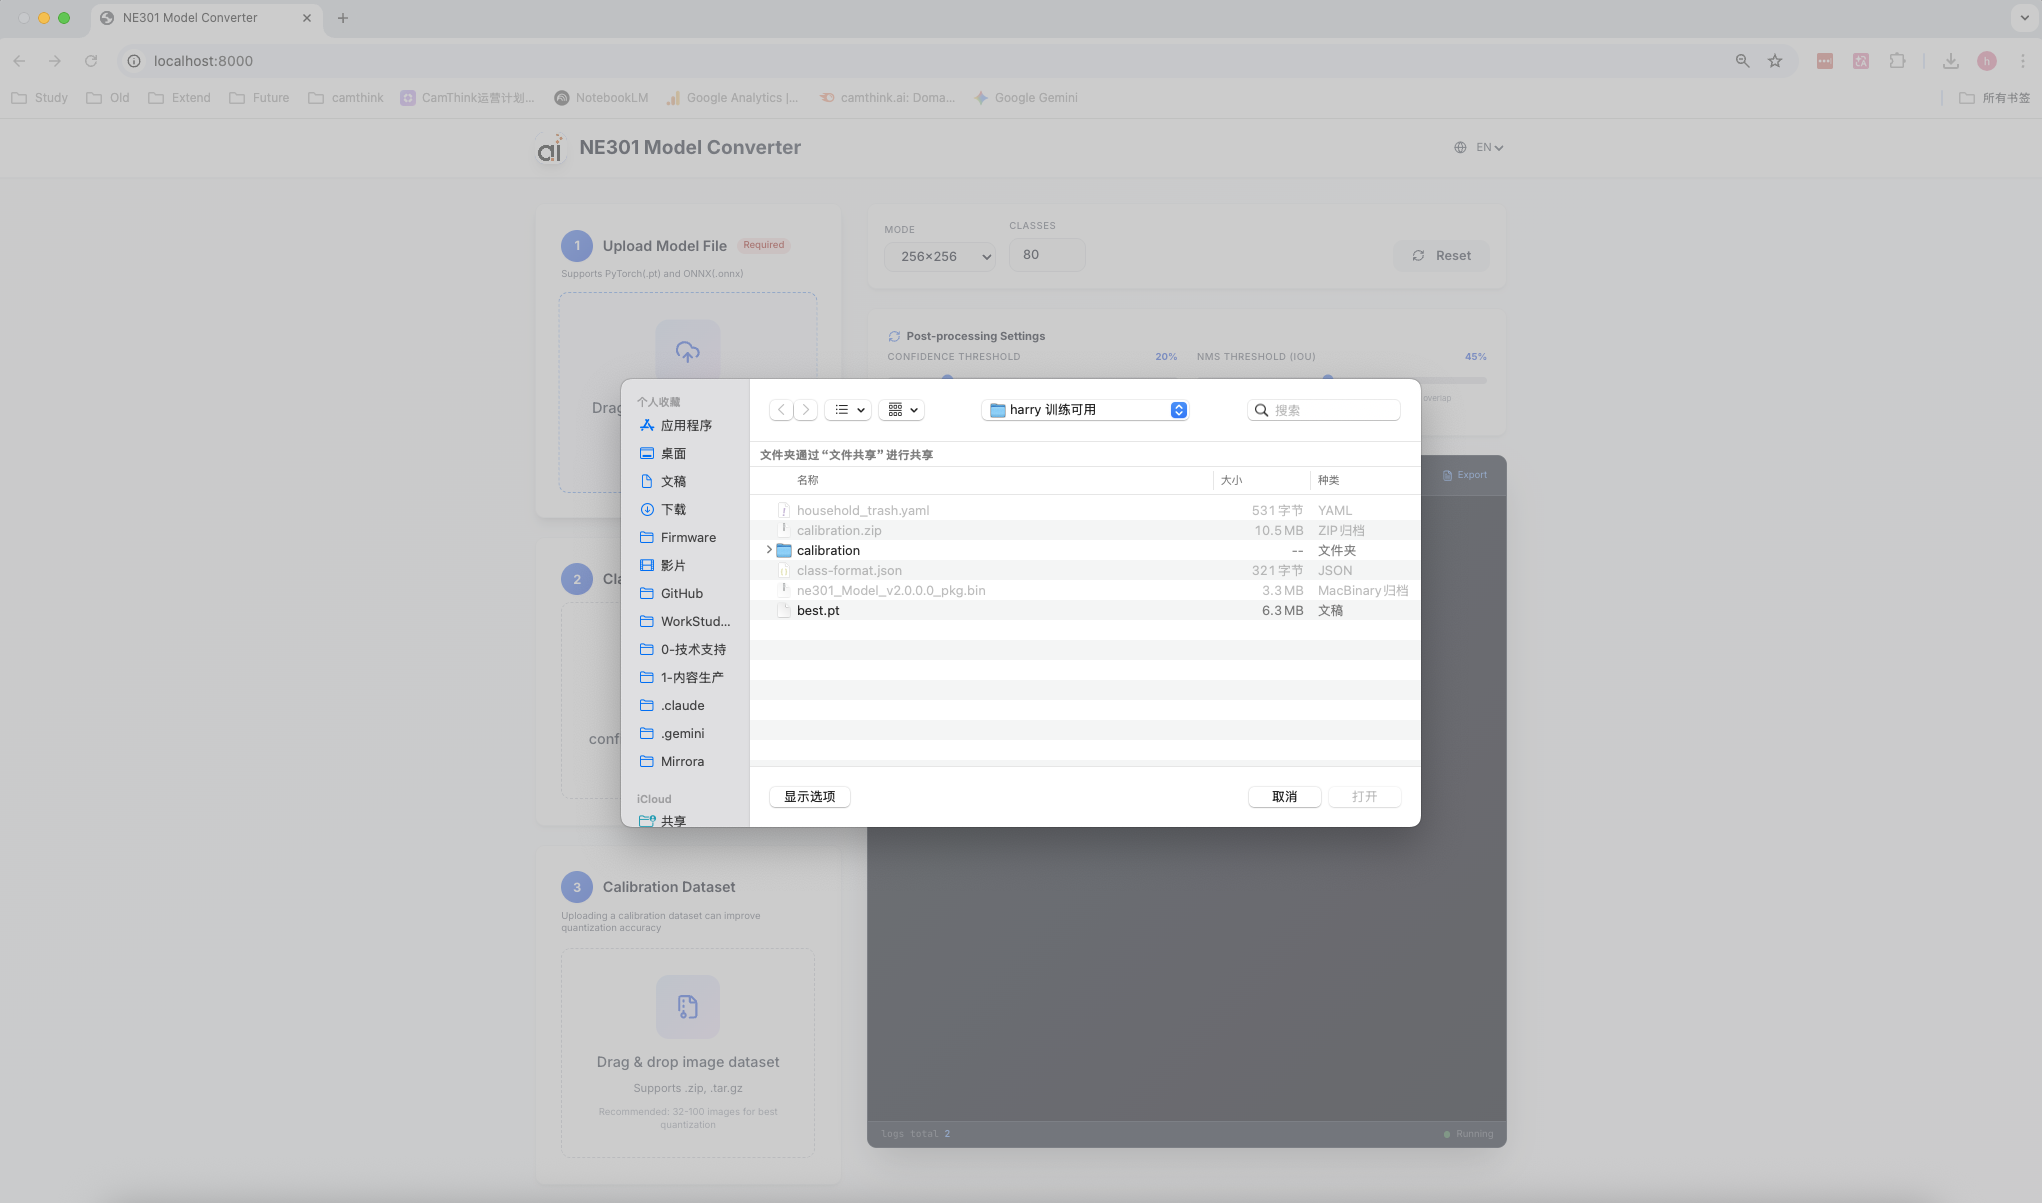
Upload PyTorch Model File
- (Recommended) Upload
classes.yaml
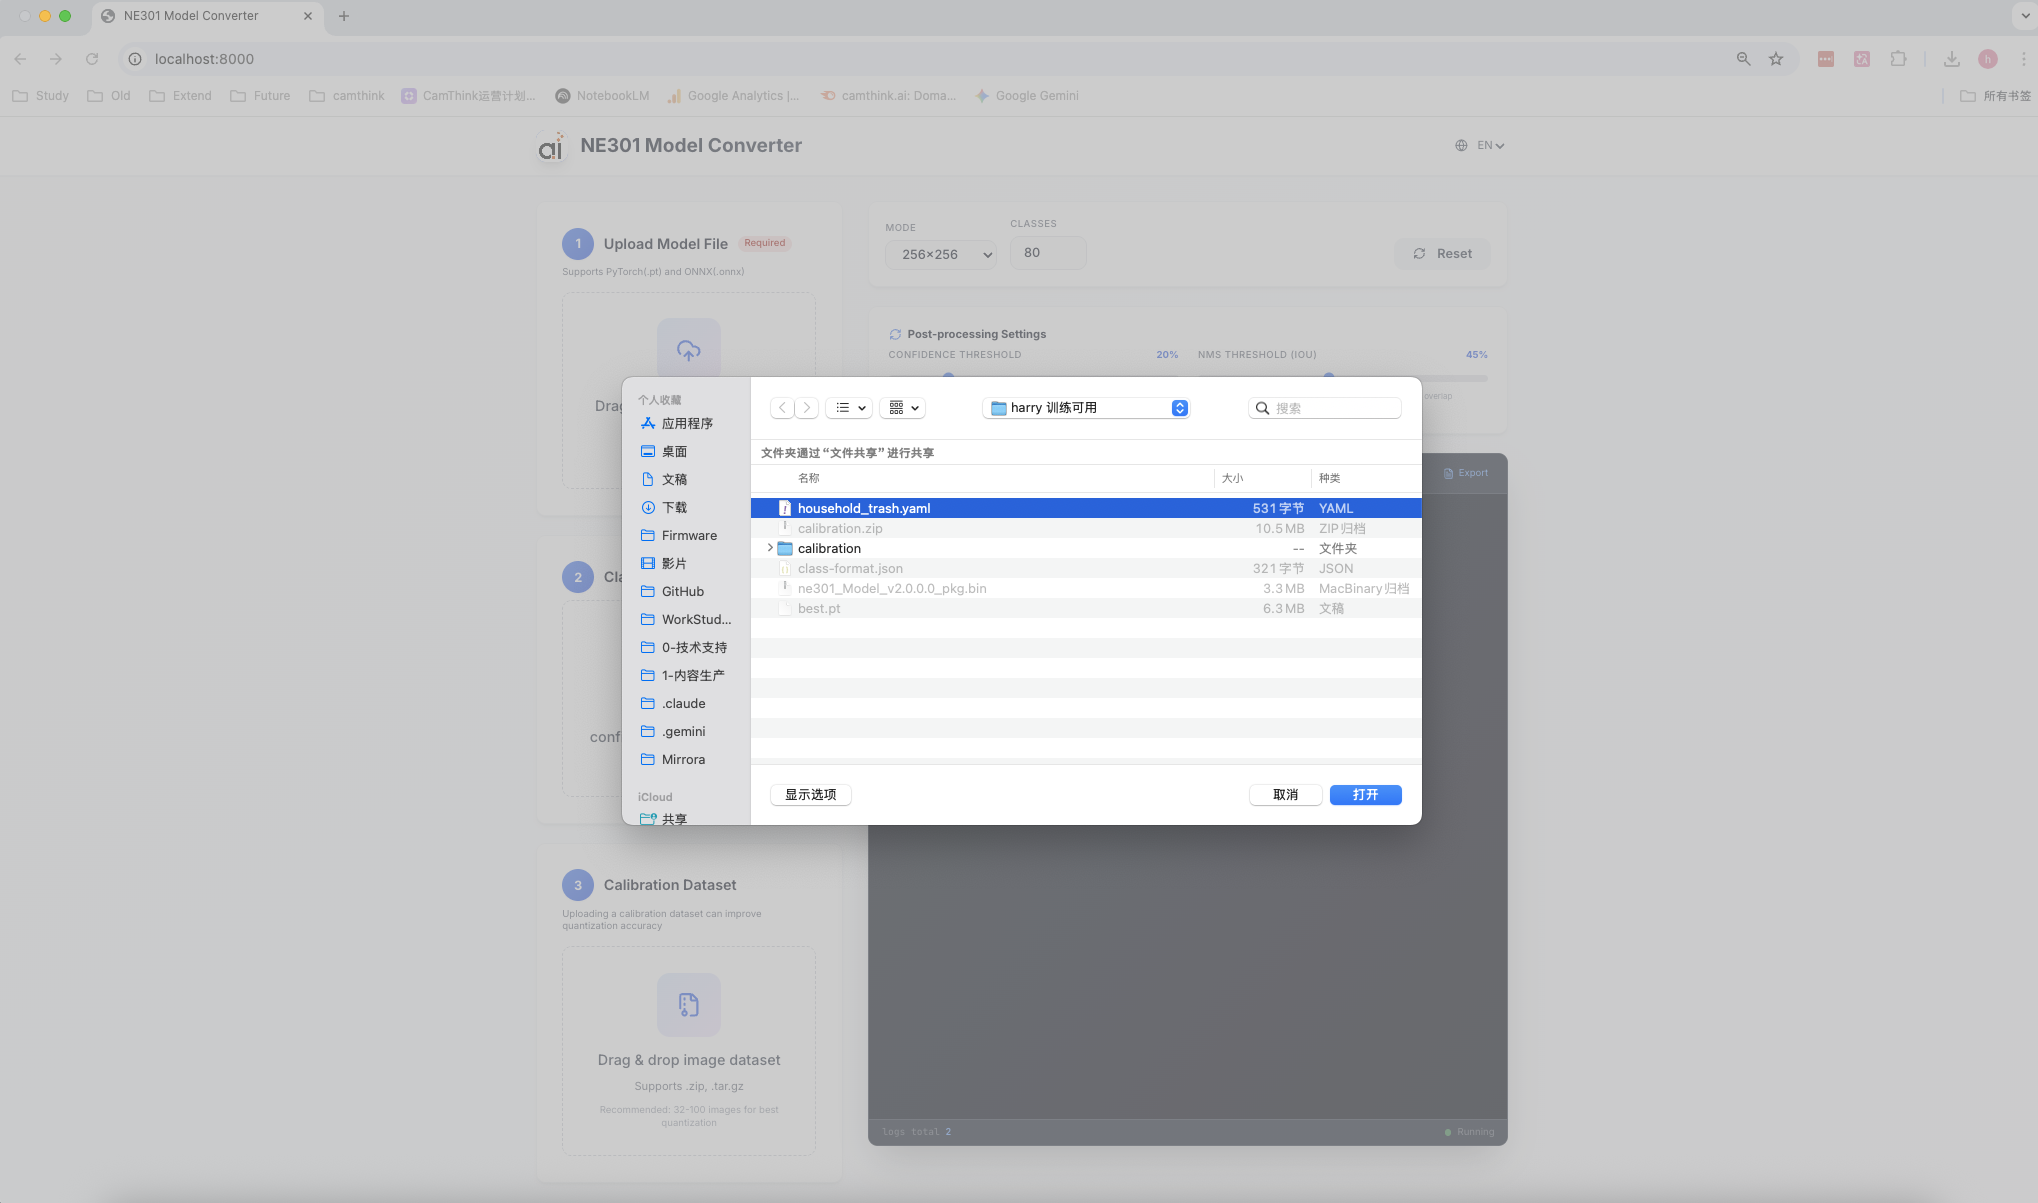
Upload Class Definition File
- (Strongly Recommended) Upload calibration dataset ZIP
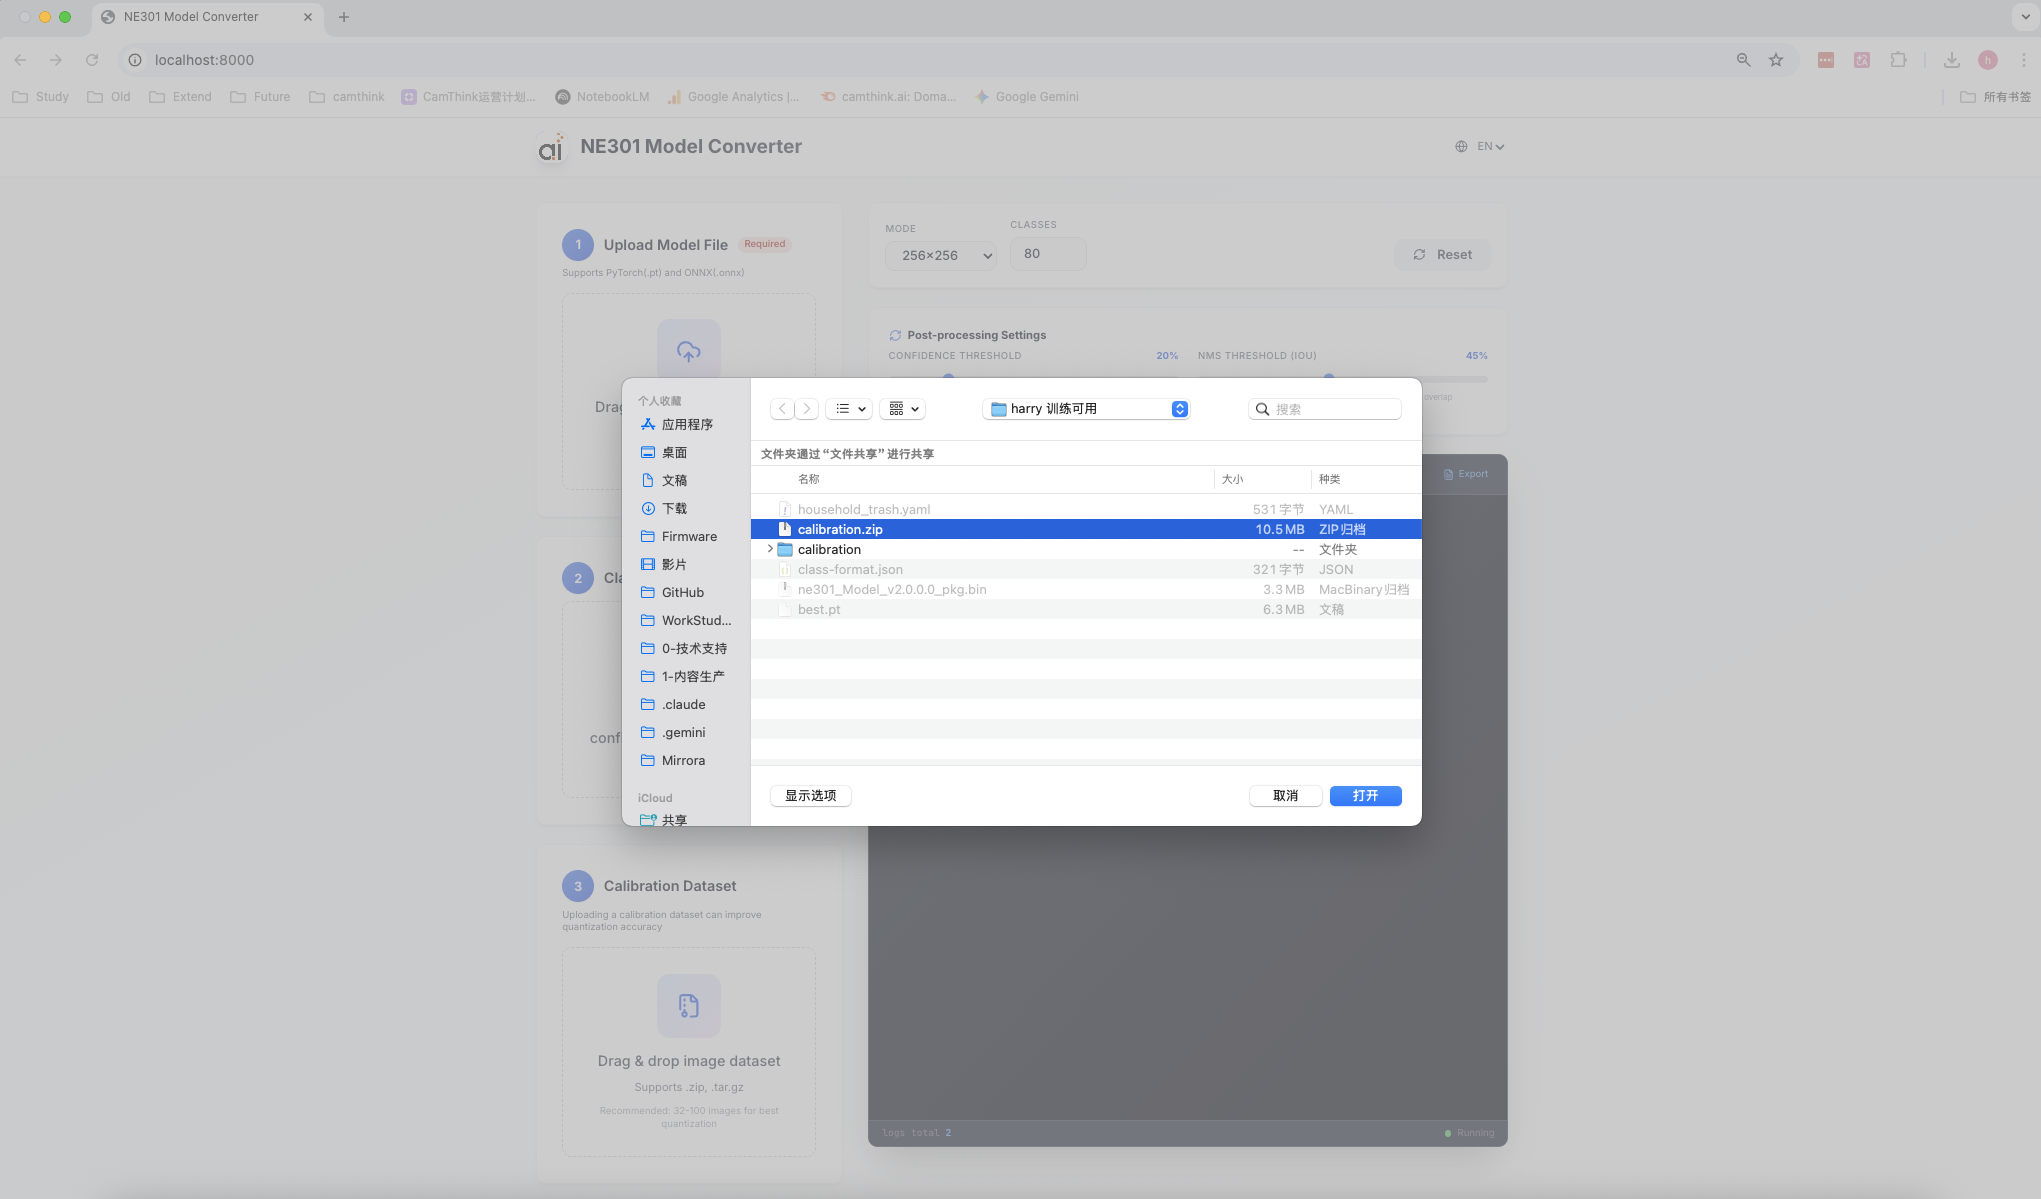
Upload Calibration Dataset
4.3 Select Conversion Preset
| Preset | Input Size | Accuracy | Speed | Use Case |
|---|---|---|---|---|
| Fast ⭐ | 256×256 | Good | Fastest | NE301 Recommended |
| Balanced | 320×320 | Better | Fast | Better quality |
| High Accuracy | 480×480 | Best | Slower | High-precision requirements |
Recommended: "Fast" preset for best balance between speed and accuracy, suitable for most edge applications.
4.4 Start Conversion
- Click "Start Conversion"
- View real-time conversion progress and logs
Conversion Pipeline:
[Step 1/4] PyTorch → TFLite (0-30%)
[Step 2/4] TFLite Quantization (30-60%)
[Step 3/4] NE301 Preparation + mpool Auto-fix (60-70%)
[Step 4/4] NE301 Packaging (70-100%)
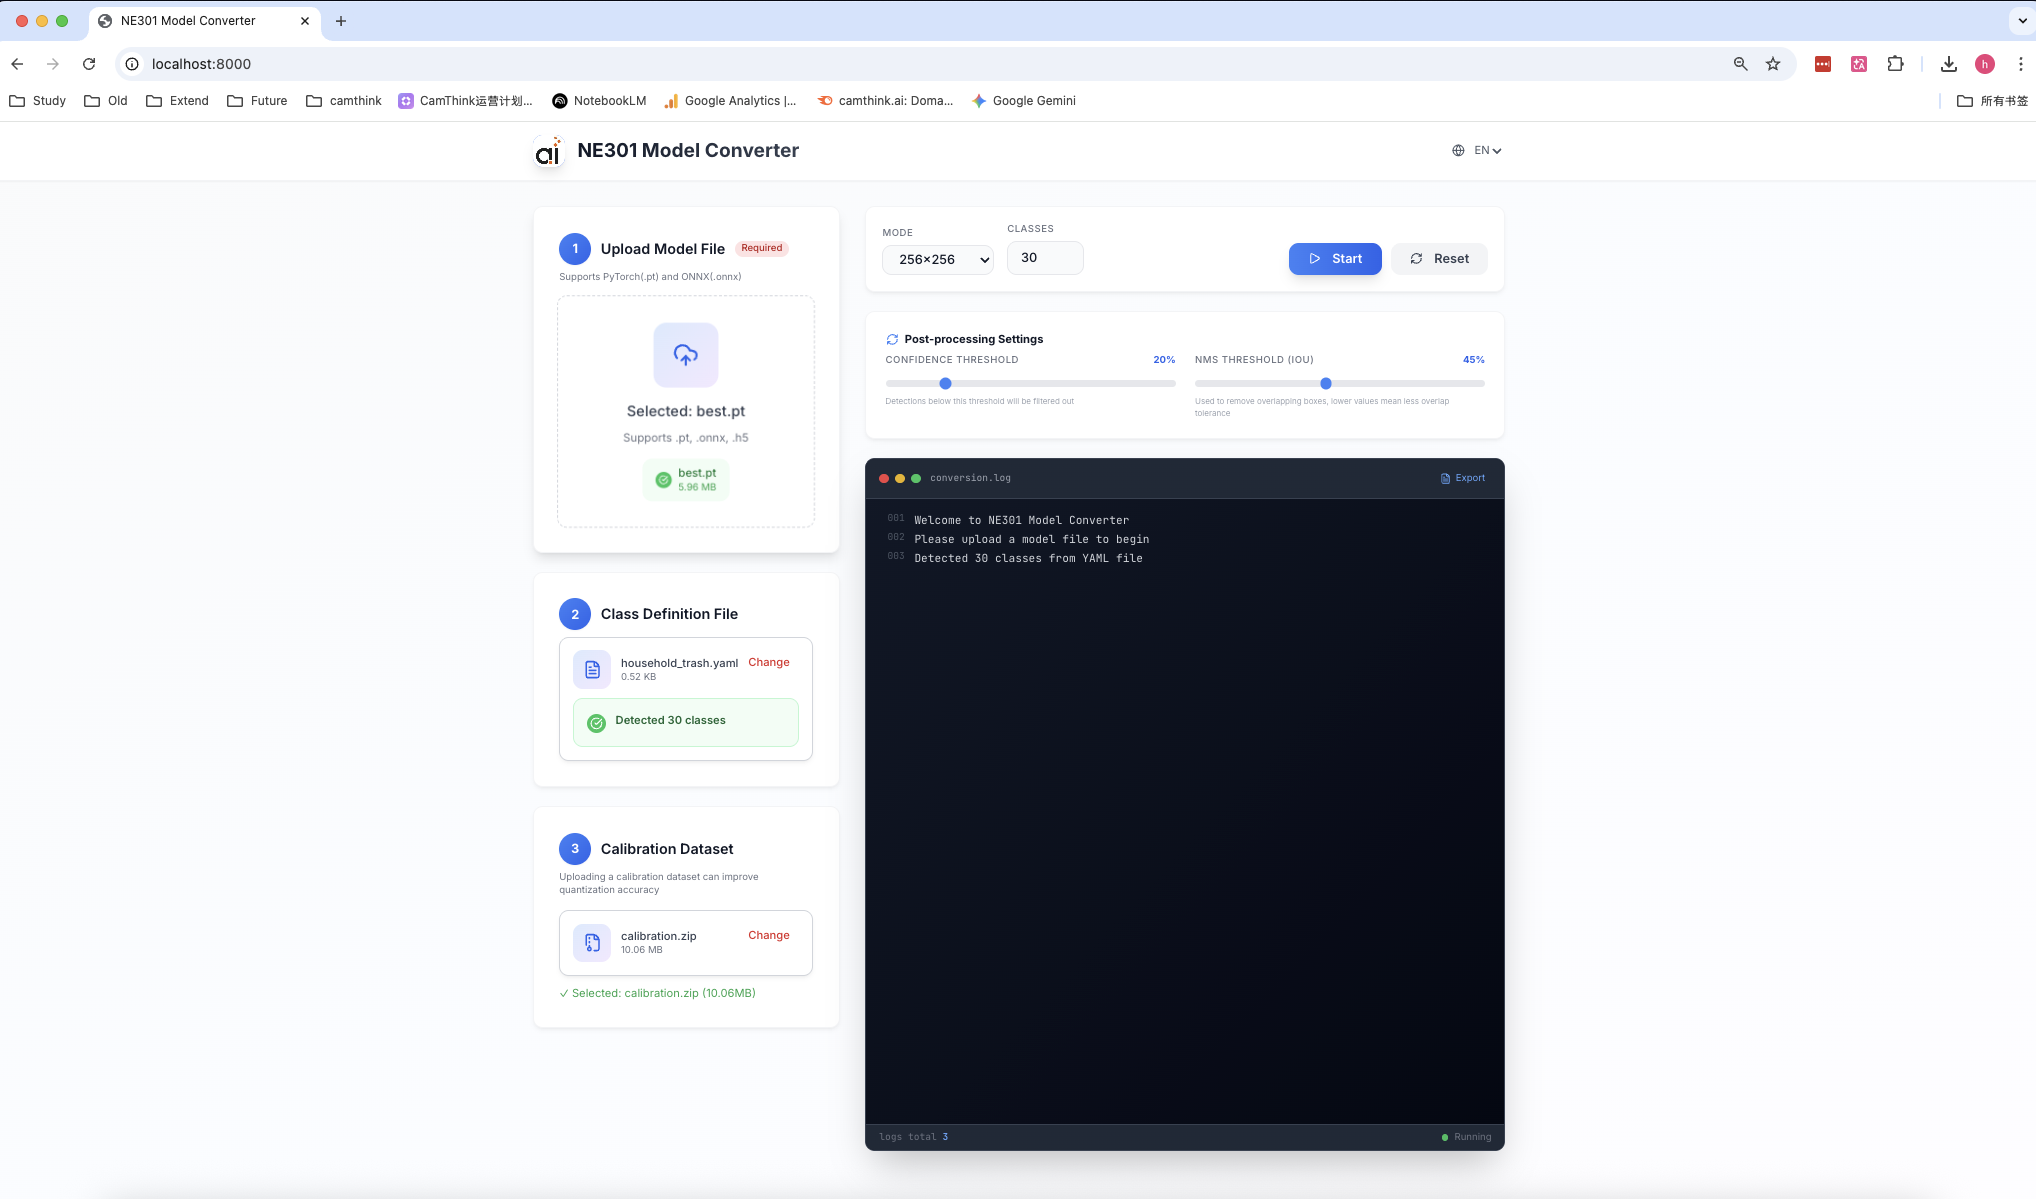
Real-time Conversion Progress Display
4.5 Download Results
After conversion completes:
- Click "Download"
- File automatically saves to local storage
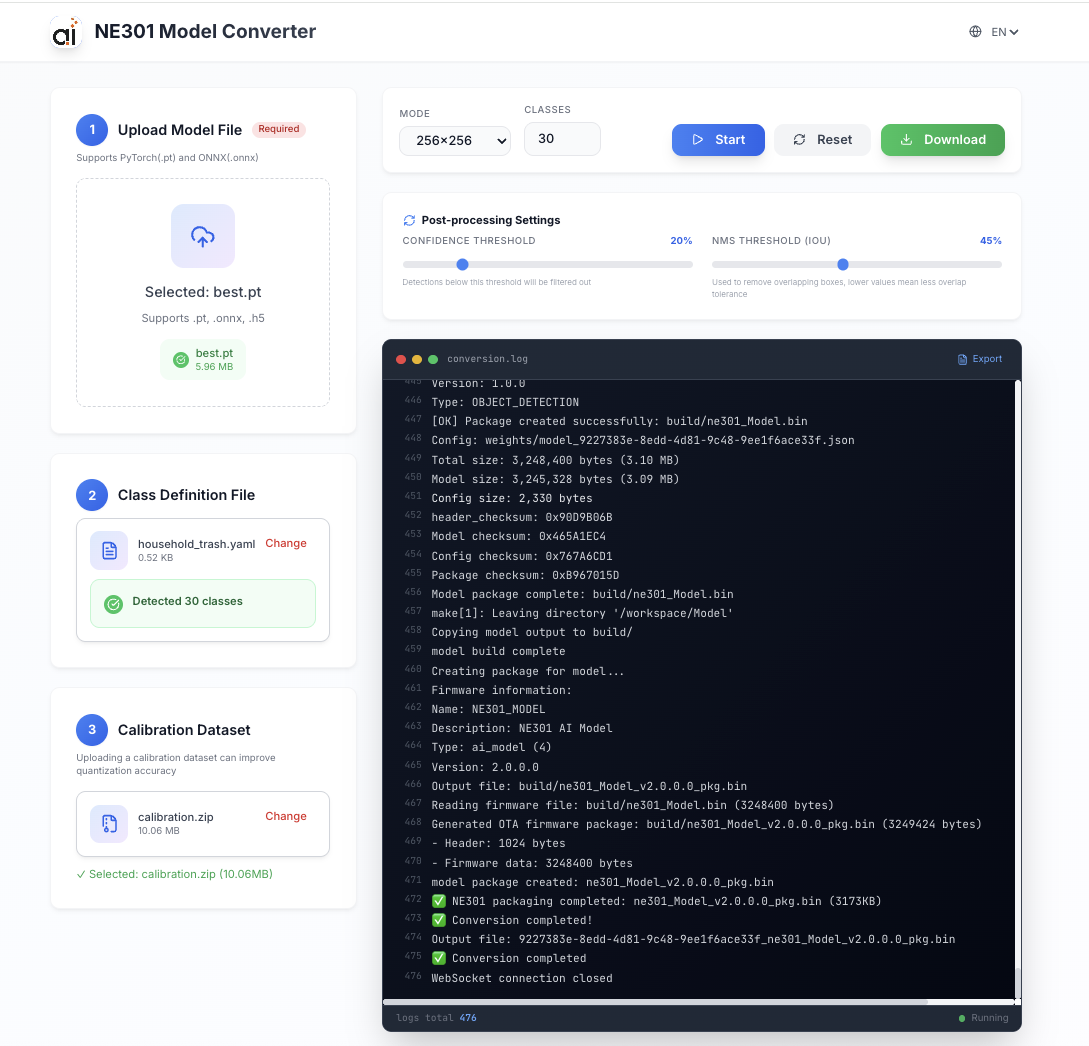
Download Conversion Result
4.6 Model Verification (Optional)
After conversion, it's recommended to verify the model on NE301 device:
- Import model to NE301 device
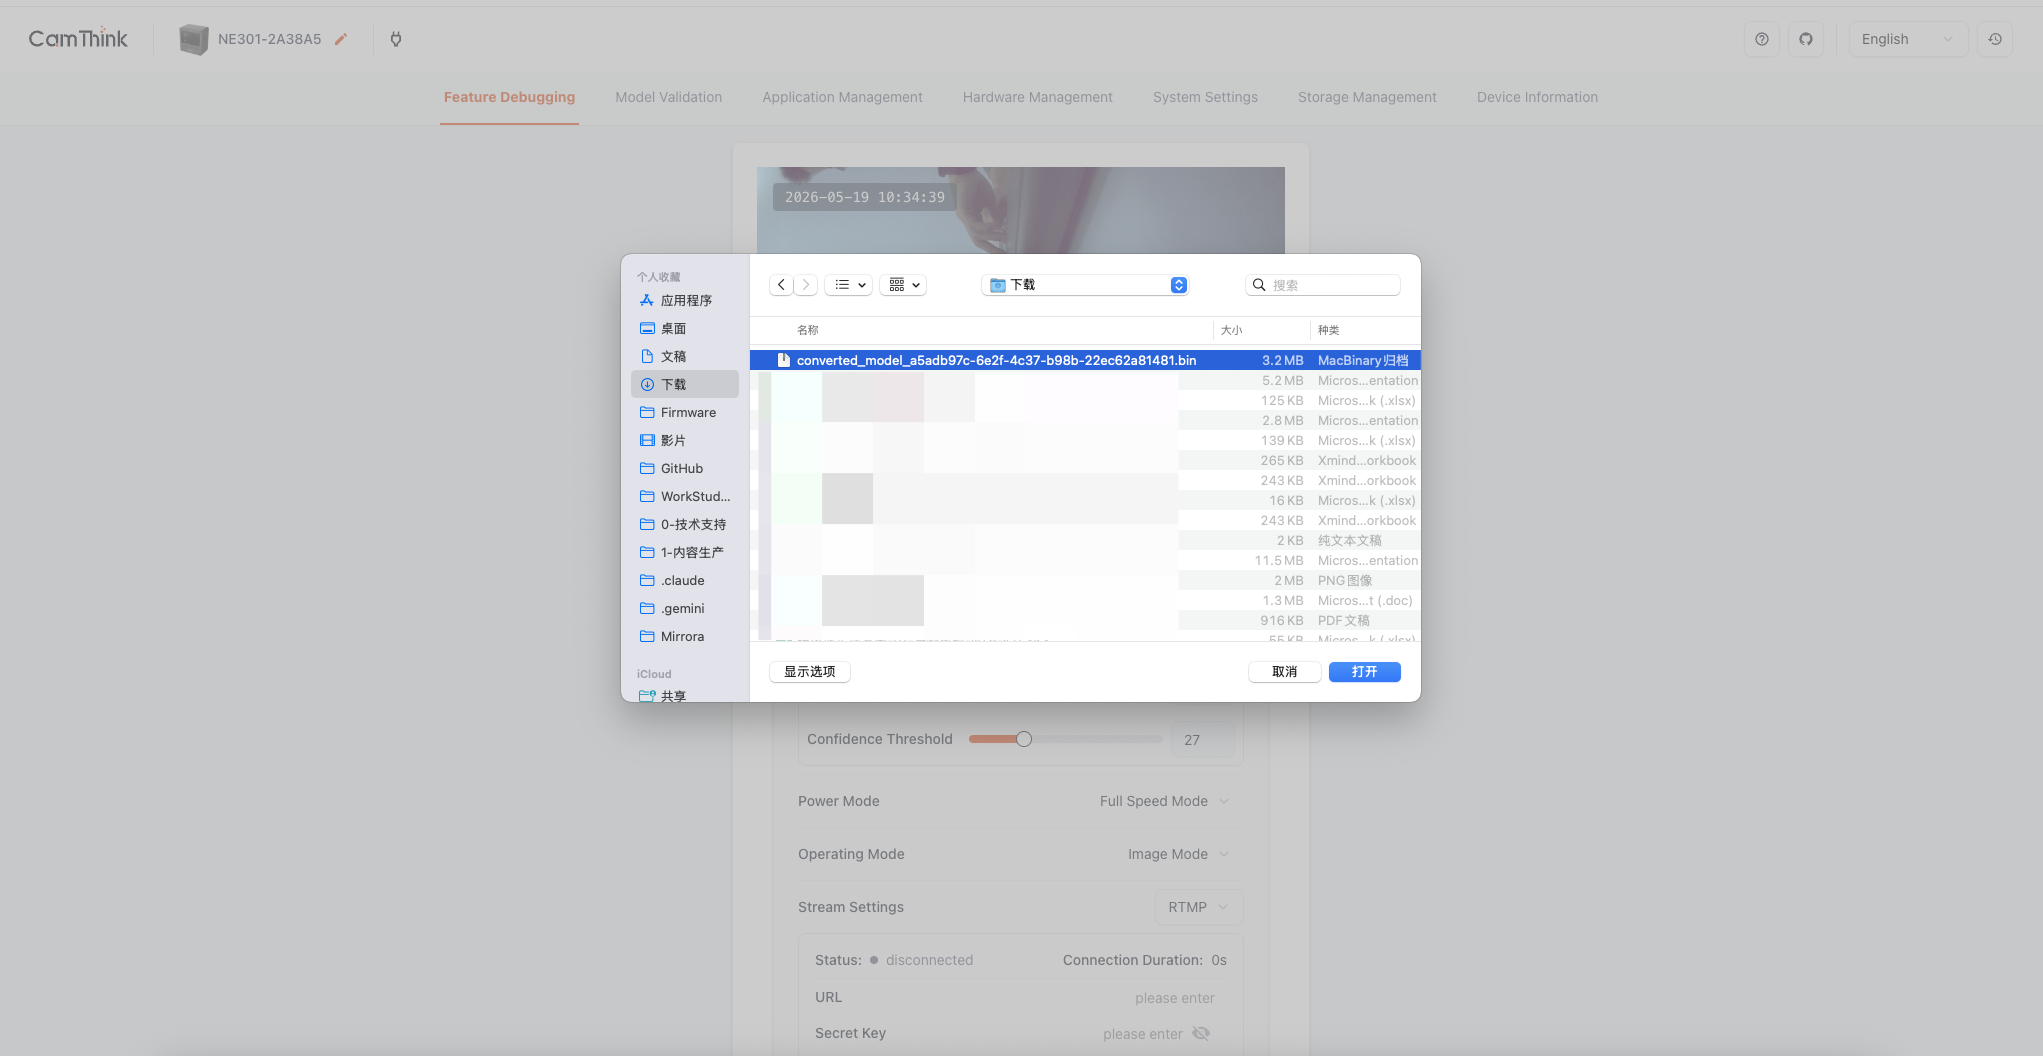
Import Model to NE301 Device
- Upload an image, and NE301 will automatically recognize and display the results
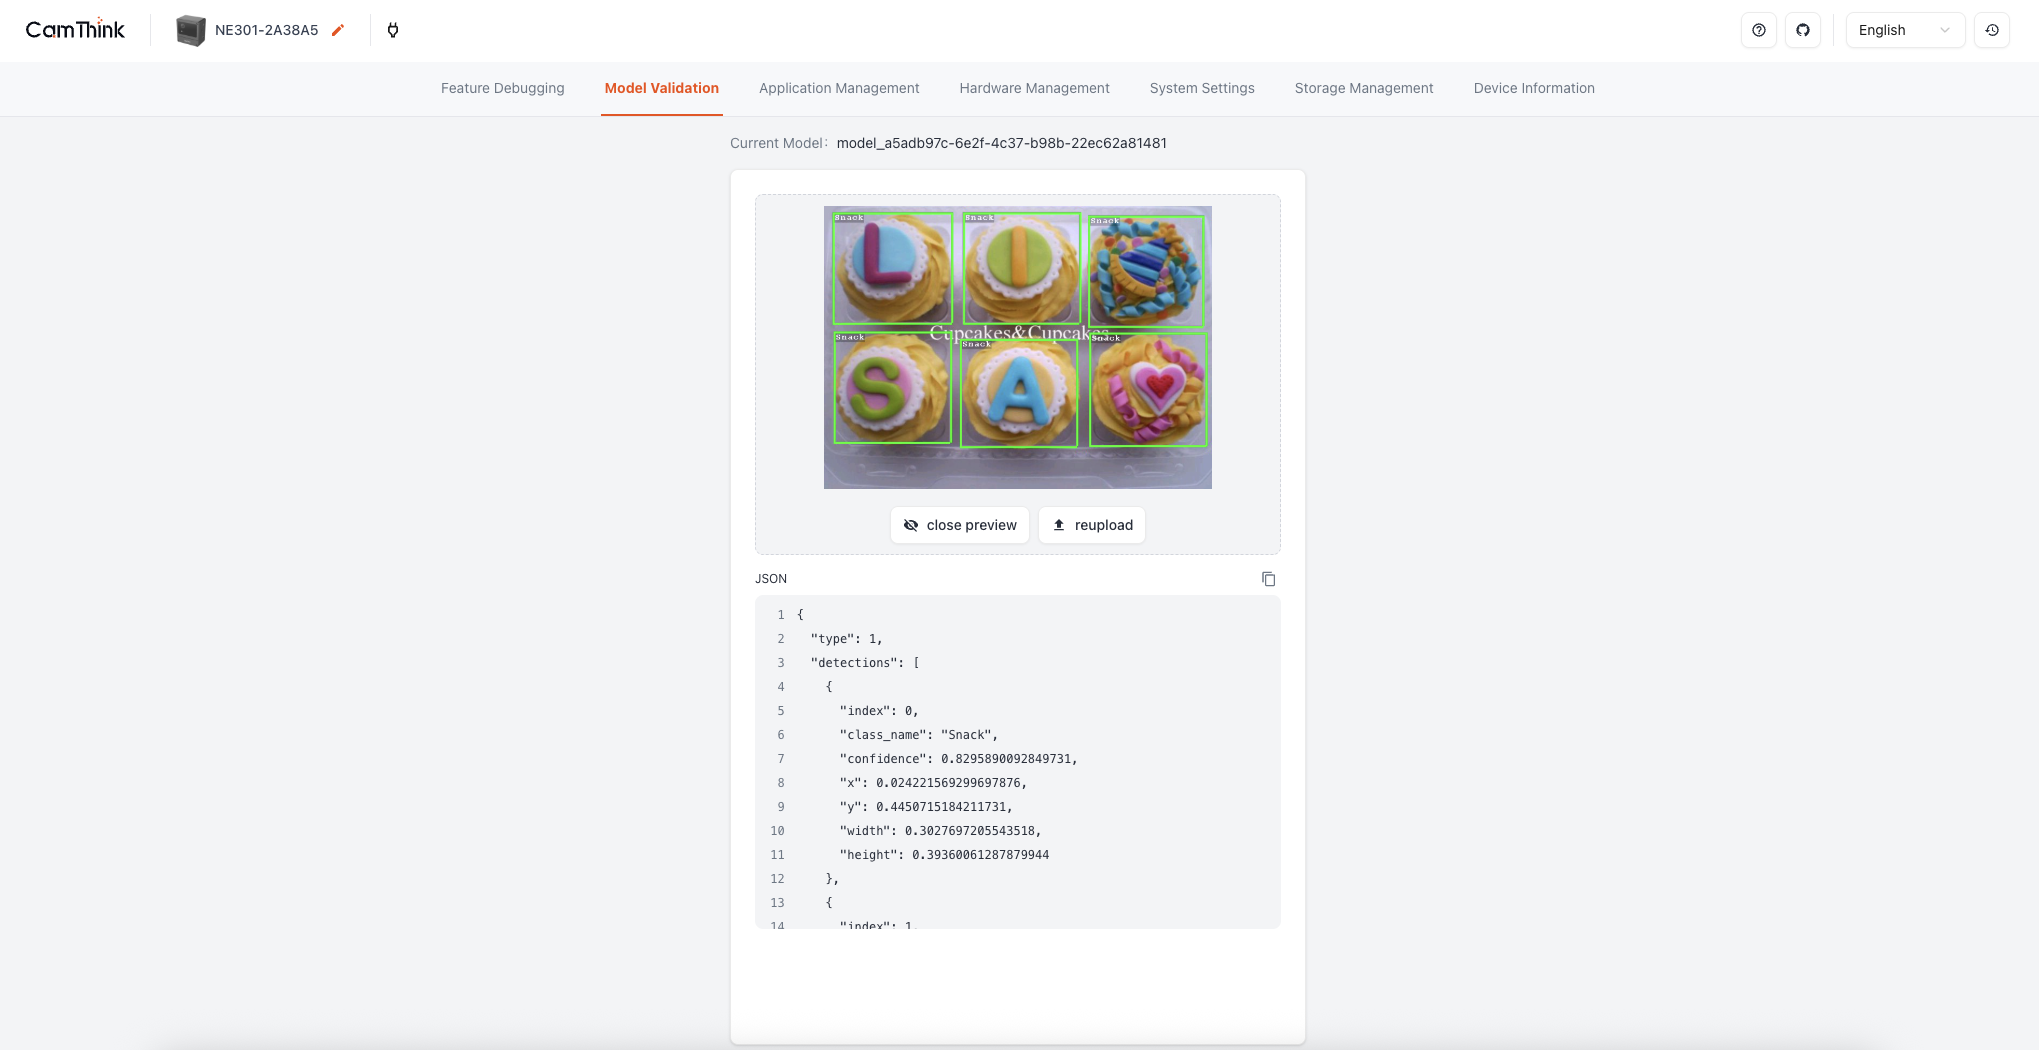
NE301 Device Model Verification
5. FAQ
Q: Is the calibration dataset required?
A: No, but strongly recommended. Without it, the system uses fake quantization, which may reduce accuracy by 5-15%. See 4.1 Prepare Model Files for details.
Q: What is the intelligent fix feature?
A: A v2.1 feature that automatically diagnoses and fixes NE301 OOM issues. The system detects mpool configuration errors and automatically fixes them to ensure successful model loading. No user intervention required.
6. Appendix
6.1 Common Commands Quick Reference
# View logs
docker-compose logs -f

# Restart services
docker-compose restart

# Stop services
docker-compose down

# Check service status
docker-compose ps

# Rebuild images
docker-compose build
6.2 Environment Variables Configuration
Create backend/.env file for custom configuration:
# Docker Configuration
NE301_DOCKER_IMAGE=camthink/ne301-dev:latest
NE301_PROJECT_PATH=/app/ne301

# Server Configuration
HOST=0.0.0.0
PORT=8000
DEBUG=False

# Log Level
LOG_LEVEL=INFO

# File Storage
UPLOAD_DIR=./uploads
TEMP_DIR=./temp
OUTPUT_DIR=./outputs
MAX_UPLOAD_SIZE=524288000  # 500MB
6.3 Related Documentation
- Project Repository - GitHub repository
- Development Documentation - Technical architecture and development guide
- Quick Start Guide - 5-minute quick start
- Docker Deployment Guide - Detailed Docker instructions
Document Version: 2.1.0
Last Updated: 2026-03-19