Video and Imaging
Media configures streams and RTSP. Image configures the picture, overlays, lens, and IR.
Media (Live View and Streams)
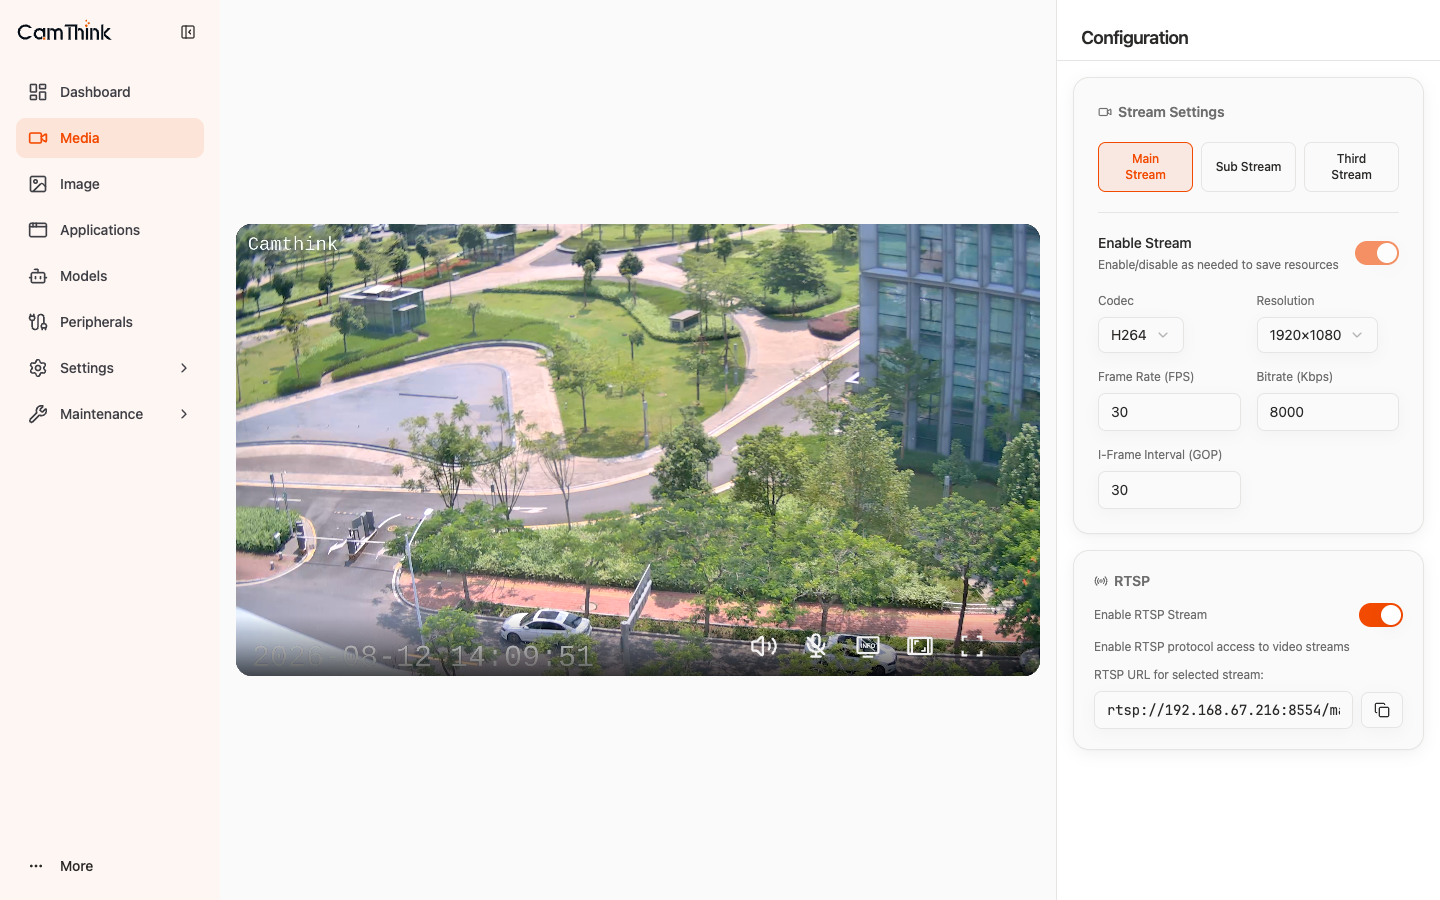
Go to the Media page: the main area shows the live feed, the toolbar sits above it, and the right-side Configuration panel configures streams and RTSP.
Toolbar
The toolbar provides volume, talk, snapshot, and full-screen controls. Talk requires a speaker.
Stream Settings
Switch between Main / Sub / Third and adjust codec, resolution, frame rate, bitrate, and I-frame interval as needed. Lower resolution or bitrate when bandwidth is limited; disable unused streams.
RTSP Streaming
Enable Enable RTSP Stream to expose the selected stream as a standard RTSP address. The URL appears in the input box with one-click copy:
| Stream | URL |
|---|---|
| Main | rtsp://<device-ip>:8554/main |
| Sub | rtsp://<device-ip>:8554/sub |
| Third | rtsp://<device-ip>:8554/third |
Default port: 8554.
RTSP Integration
External systems pull NE503 streams through RTSP.
- RTSP over TCP is required.
- The default port is
8554and has no username or password. Use a firewall before public-network deployment; see Security Hardening. - AI apps should use
suborthirdraw frames.mainprovides encoded video only and cannot be used as an inference input.
Example: Verify the Stream with VLC
RTSP is the primary protocol for integrating NE503 with NVR / VMS platforms. Verify the stream quickly with VLC:
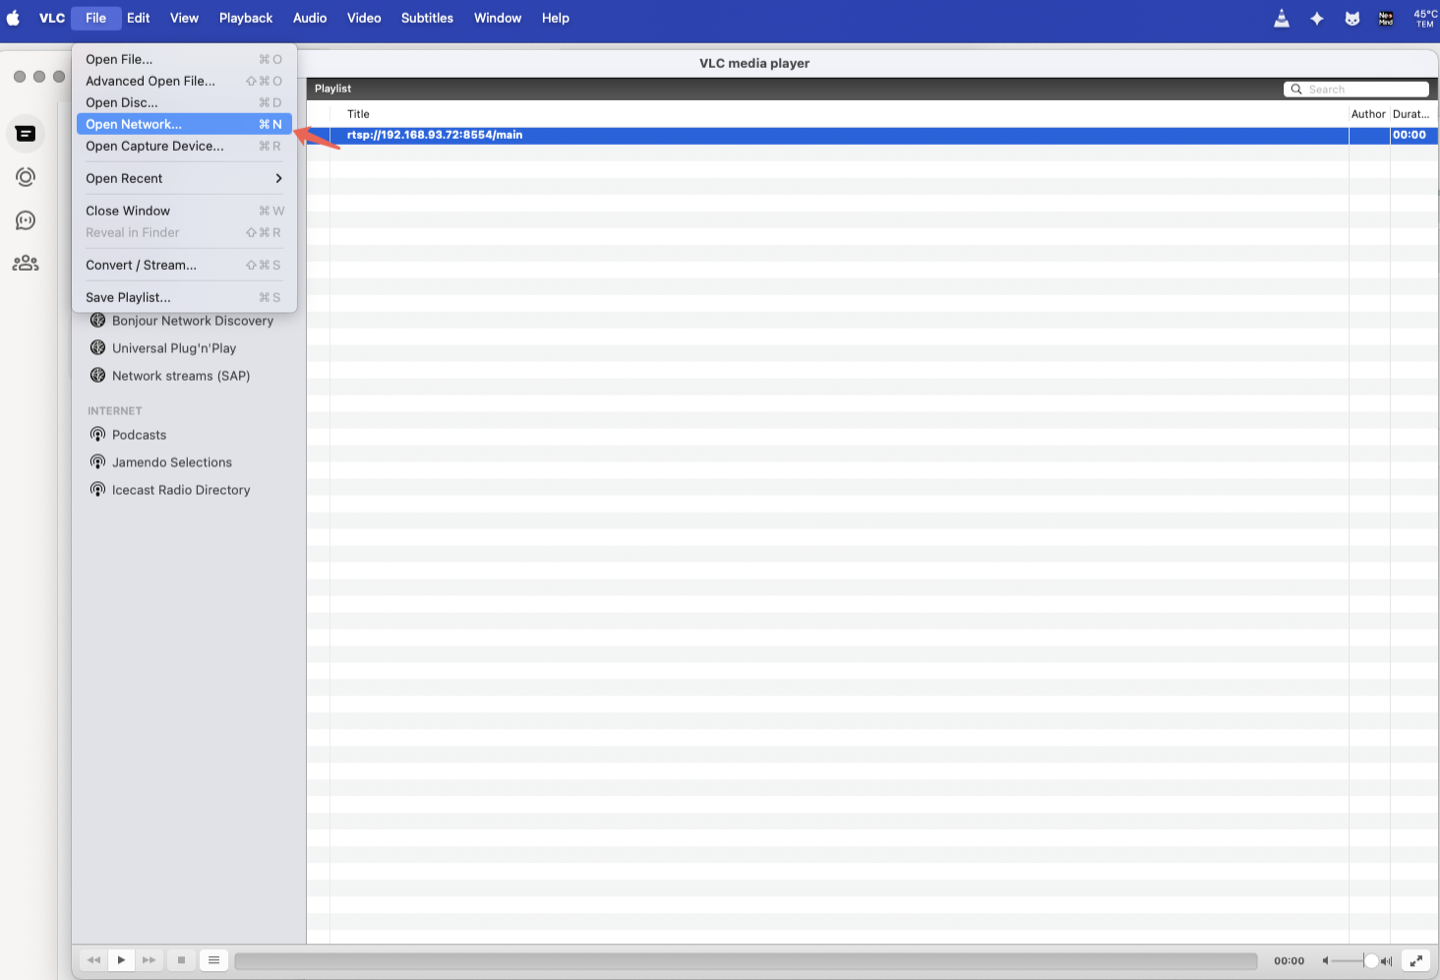
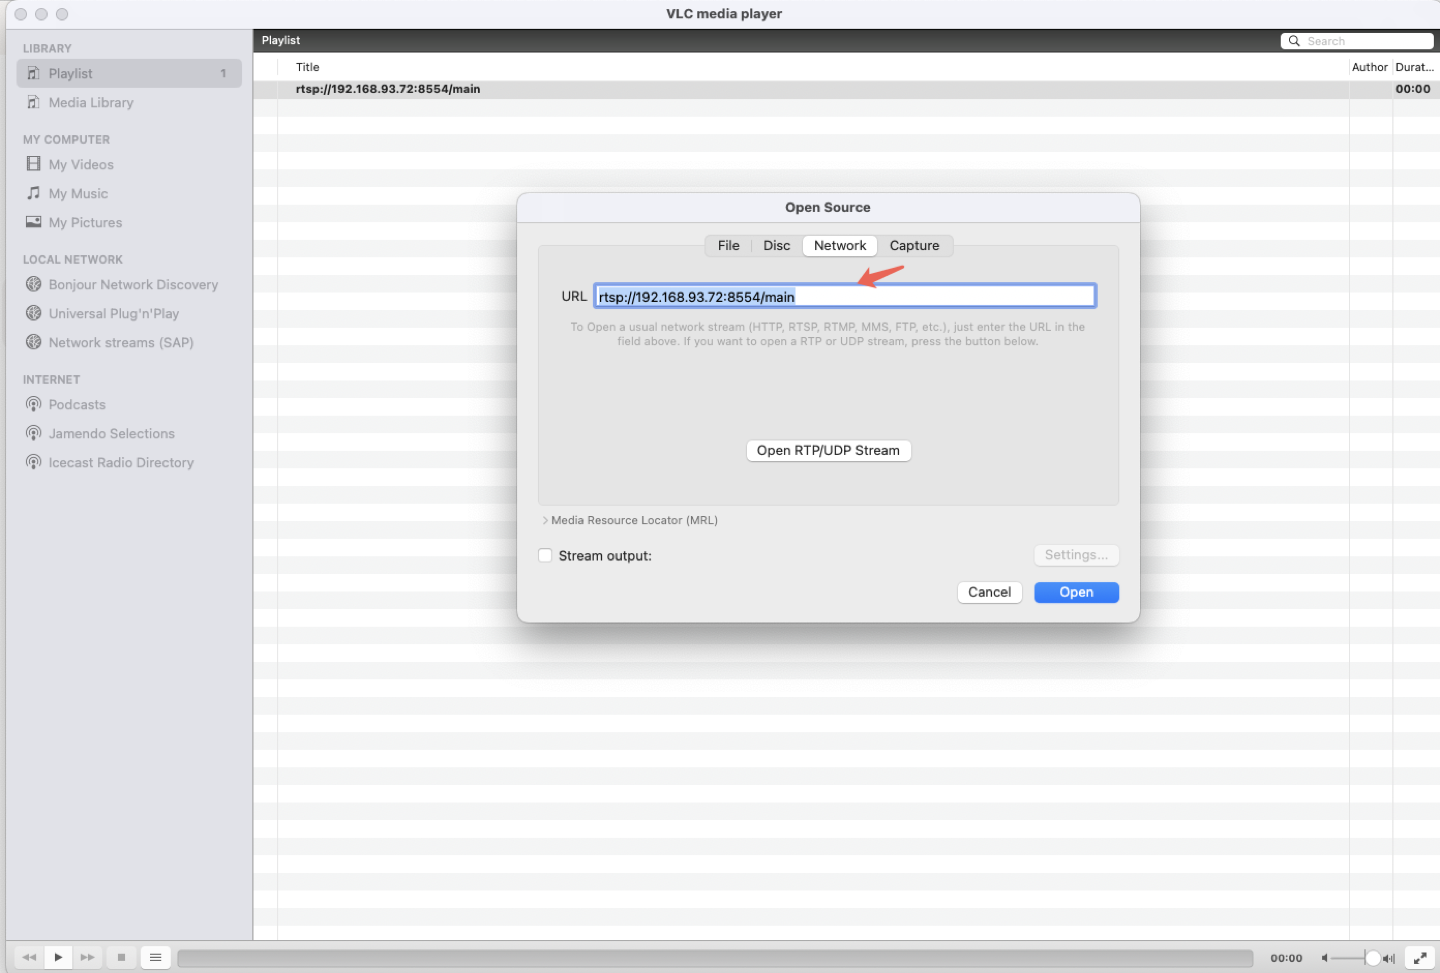
- Open VLC → Media → Open Network Stream, and enter the RTSP URL from the table above:
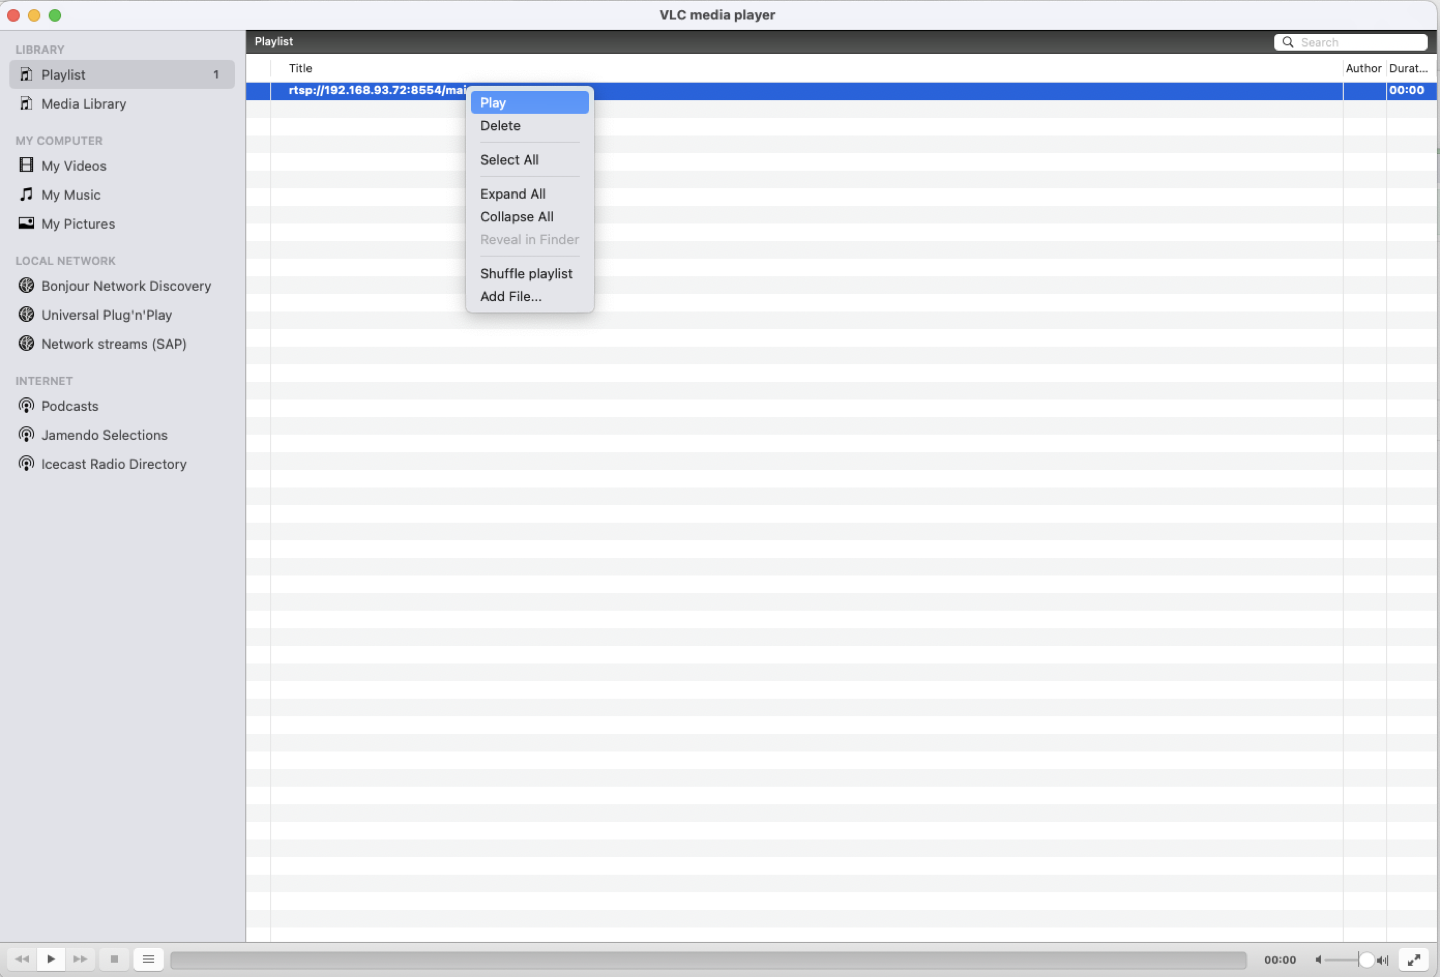
- Click Play and confirm smooth playback without artifacts:
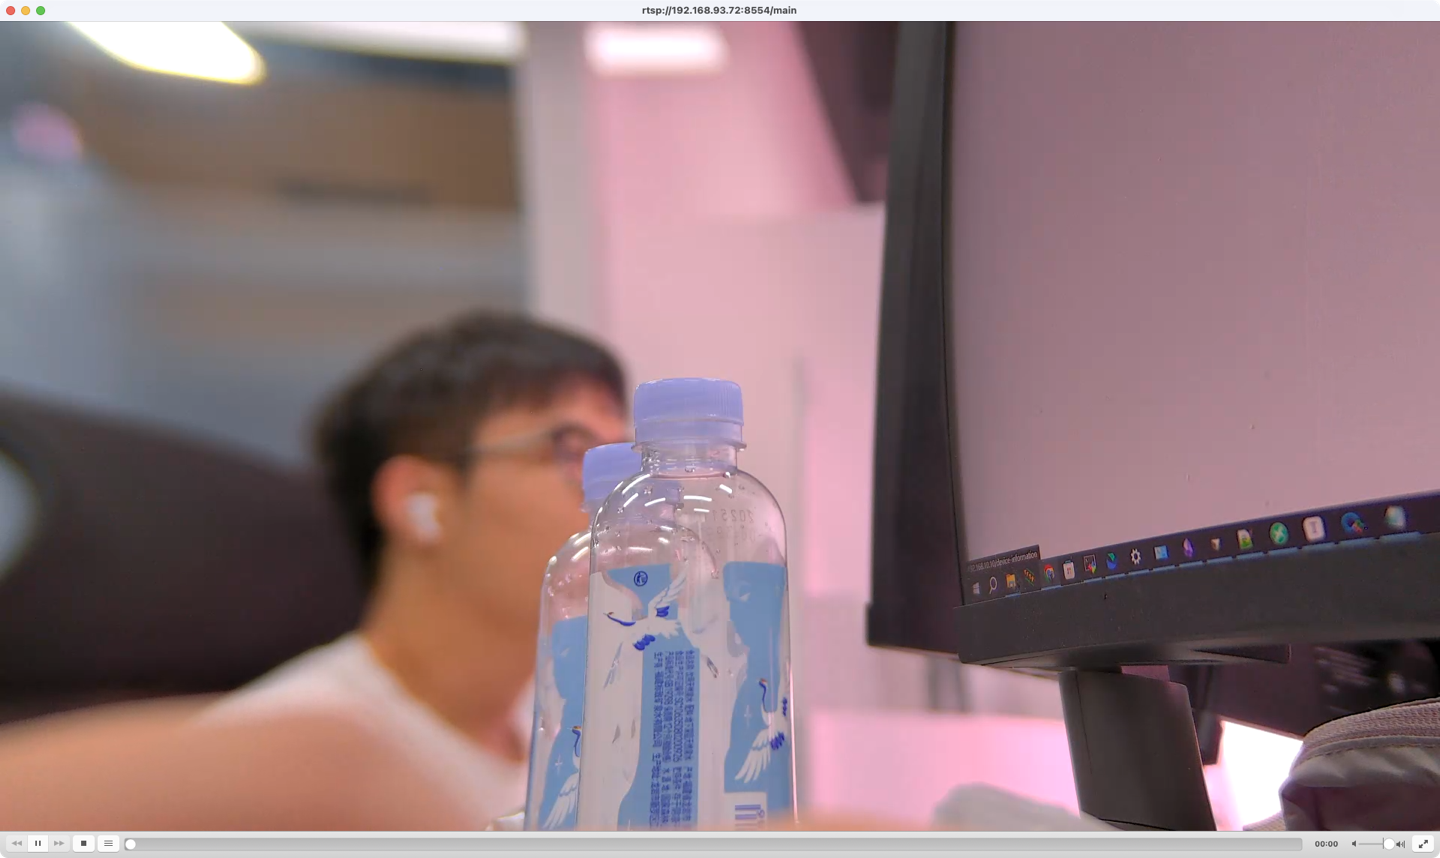
If the stream won't pull, check stream status with
aipc-cli stream list.
Command-Line Verification
FFmpeg commands must specify TCP:
ffmpeg -rtsp_transport tcp -i "rtsp://<device-ip>:8554/main" -t 10 -f null -
No error and continuous frames confirm that the stream is available.
Connect to an NVR / VMS
NE503 supports two integration methods: ONVIF auto-discovery and manual RTSP.
Option 1: ONVIF auto-discovery (enable on demand)
The device ships an ONVIF Profile S service that handles device discovery and stream-URI distribution. ONVIF-capable NVR / VMS platforms such as Milestone and Blue Iris can discover the device automatically; video always flows through RTSP (8554) — the ONVIF service is signalling only.
- Freshly flashed devices have ONVIF disabled by default; devices upgraded from older releases keep their previous enabled state.
- Enable over SSH:
systemctl enable --now onvif-device; disable:systemctl disable --now onvif-device. - When enabled, the device exposes UDP 3702 (WS-Discovery) and TCP 8081 (ONVIF SOAP). Restrict them at the firewall before public-network deployment; see Security Hardening.
Option 2: manual RTSP
Add the device manually in NVRs that do not use ONVIF:
- Choose "Add device manually" or "Custom RTSP"
- Fill in the RTSP address:
rtsp://<device-ip>:8554/main - Select TCP as the transport protocol
- Choose the stream as needed:
mainfor NVR recording,subfor multi-view preview
Image (Picture, Overlays, and Lens)
The Image page has Image / Overlay / Control sub-tabs. Available lens controls depend on the installed lens configuration.
Quality and Transform (Image Tab)
Day / Night Mode
Day / Night Mode at the top of the Image tab controls how the camera switches between day and night:
| Mode | Behavior |
|---|---|
| Auto | Switches automatically by light thresholds; the enter-night (Enter night ≤) and enter-day (Enter day ≥) thresholds are adjustable by sliders in Auto mode only |
| Day | Fixed daylight profile; IR illumination is off (IR switches disabled) |
| Night | Fixed night profile, used together with IR illumination |
The mode and threshold settings persist across reboots.
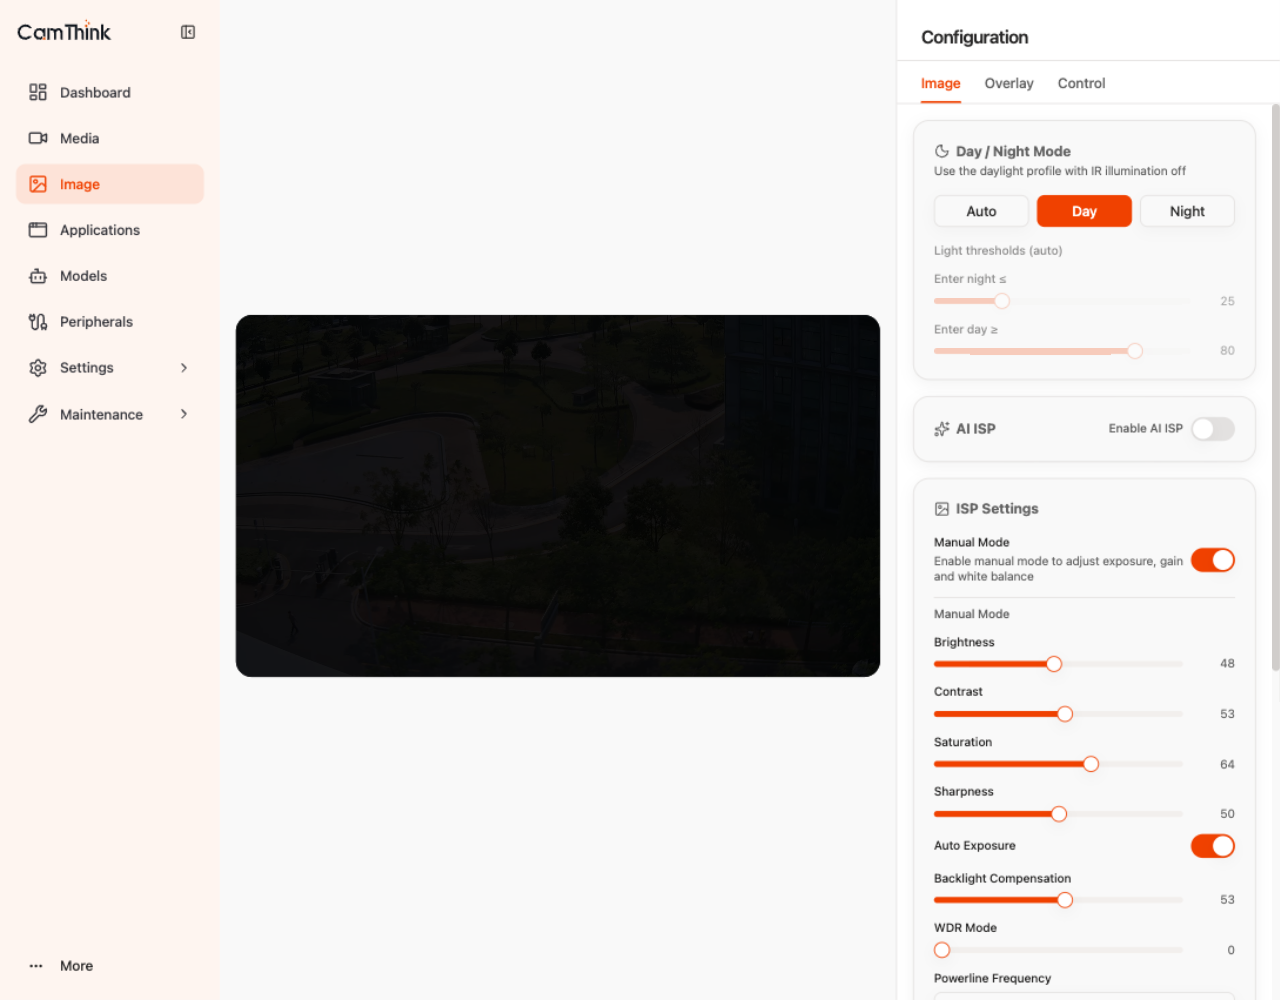
Enable Enable AI ISP to enhance low-light and high-dynamic-range scenes.
ISP Settings
Manual Mode fixes exposure, gain, and white balance. Set Powerline Frequency to the local 50Hz/60Hz; adjust White Balance when colors are incorrect.
Transform
Use Rotation / Flip to match the installation direction, Distortion for wide-angle correction, and Grayscale for IR scenes. DIS / EIS provides stabilization; EIS requires an IMU.
Overlays and Privacy Masking (Overlay Tab)
In Overlay, select the target Stream, then configure overlays or masks. Overlays can be dragged on the live feed.
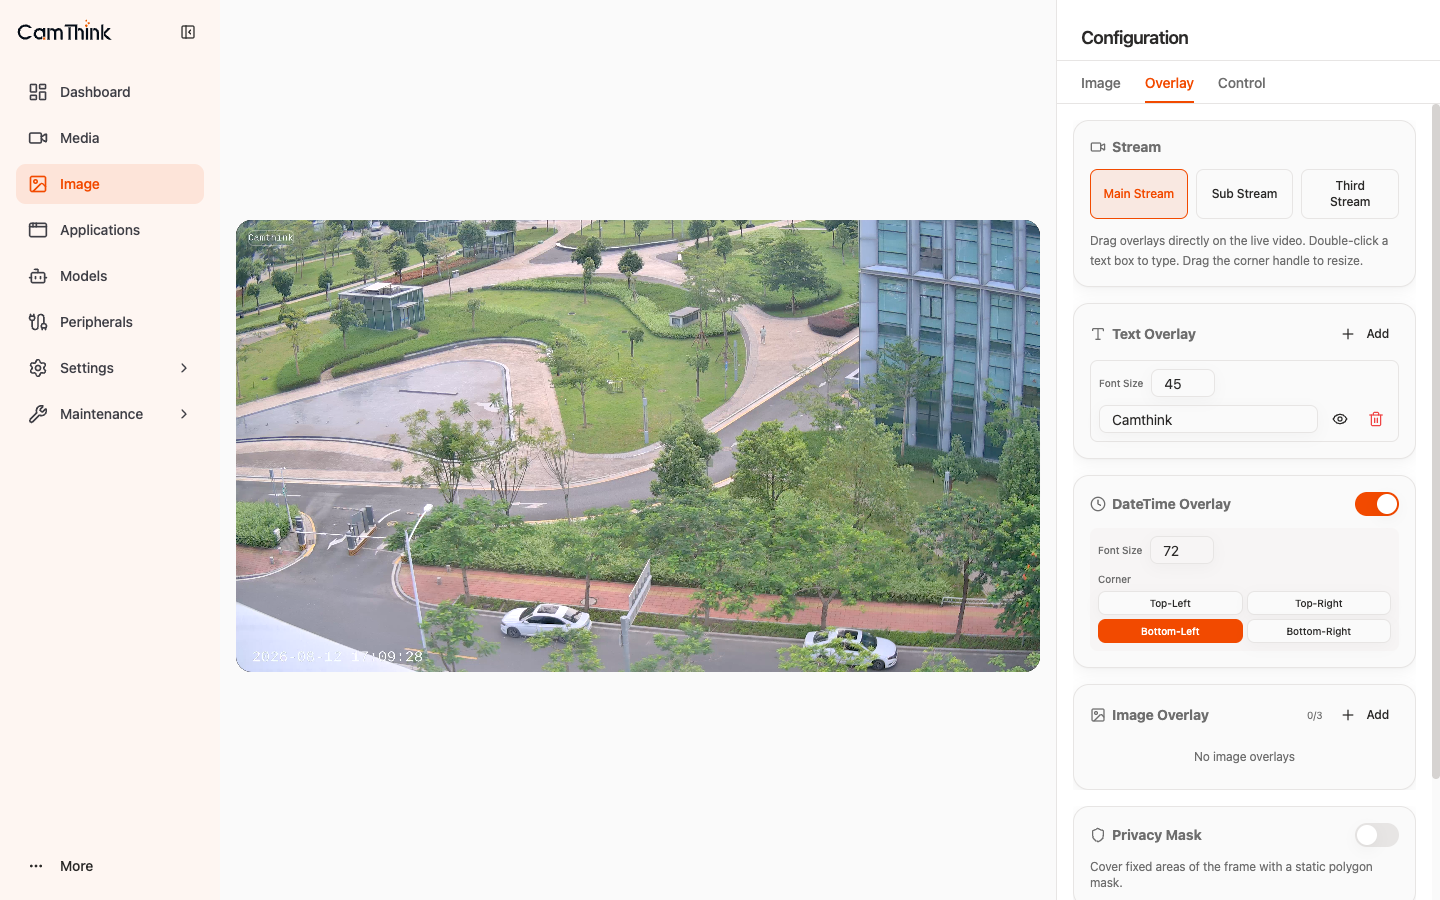
Information Overlays
Text Overlay, DateTime Overlay, and Image Overlay display text, time, and images. Follow the page's size and upload limits.
Privacy Masking
Privacy Mask covers a fixed area; AI Auto Mask follows detected targets. They operate independently.
Lens and IR (Control Tab)
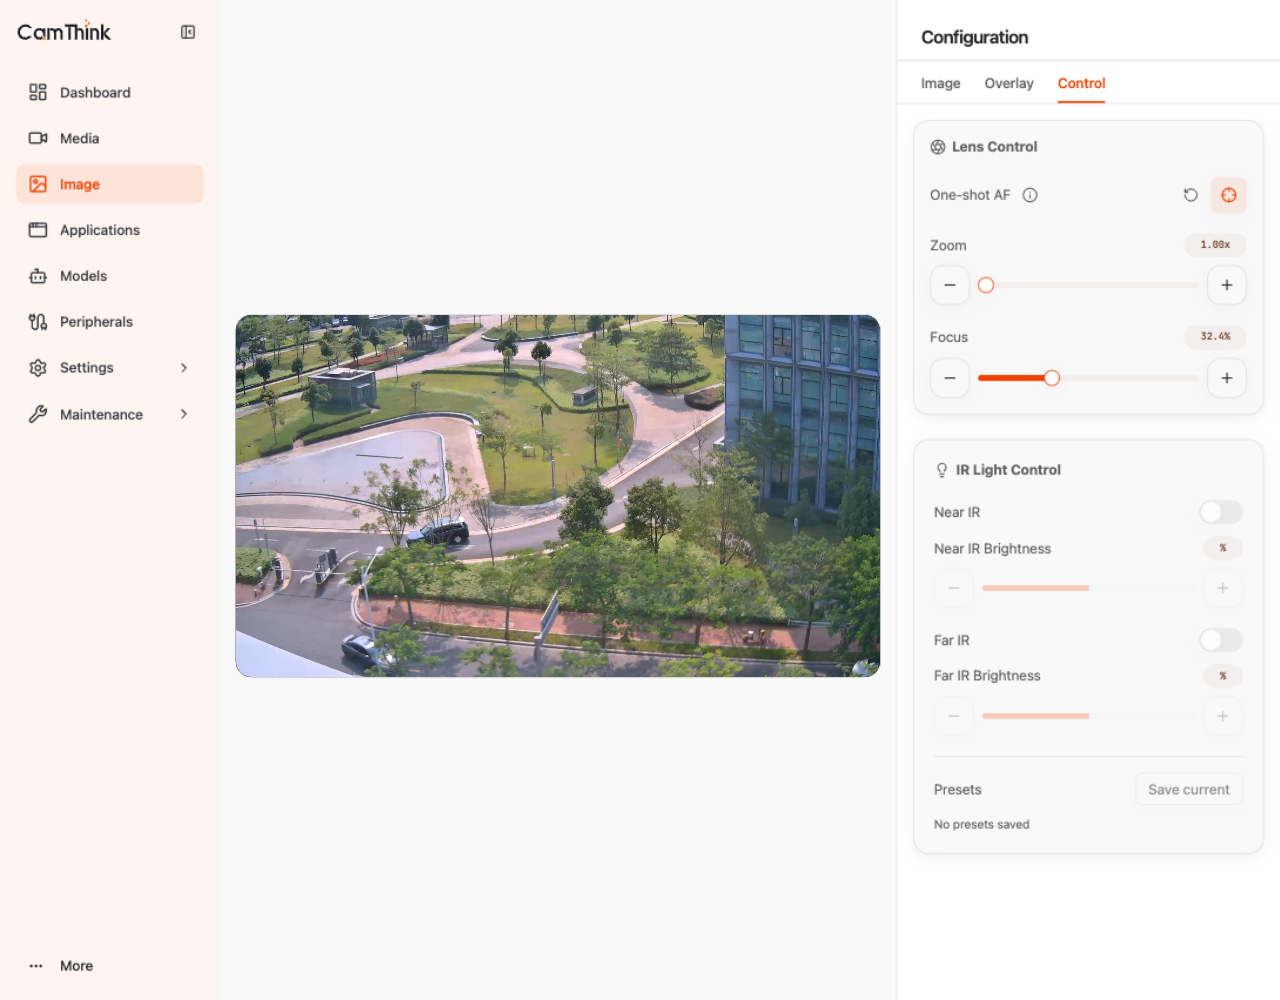
Lens Control
Use Zoom, Focus, and One-shot AF to adjust the lens. Reset to 1.0x returns to minimum zoom. Available controls depend on the installed lens: fixed-focus lenses hide motor controls such as Zoom and Focus.
Presets
Save current stores the current zoom and focus position as a preset; saved presets can be recalled with one click, which suits fixed-point scenarios that repeatedly return to the same field of view. Lens positions and presets persist across reboots.
IR Light Control
Near IR and Far IR control short- and long-range fill light and brightness. Adjust them by scene and distance; the switches are disabled while Day / Night Mode is Day. The IR-cut filter switches automatically with the day/night mode.
Remote app control of lens or IR requires the Device Control permission.